


Soldering and Hand Tools
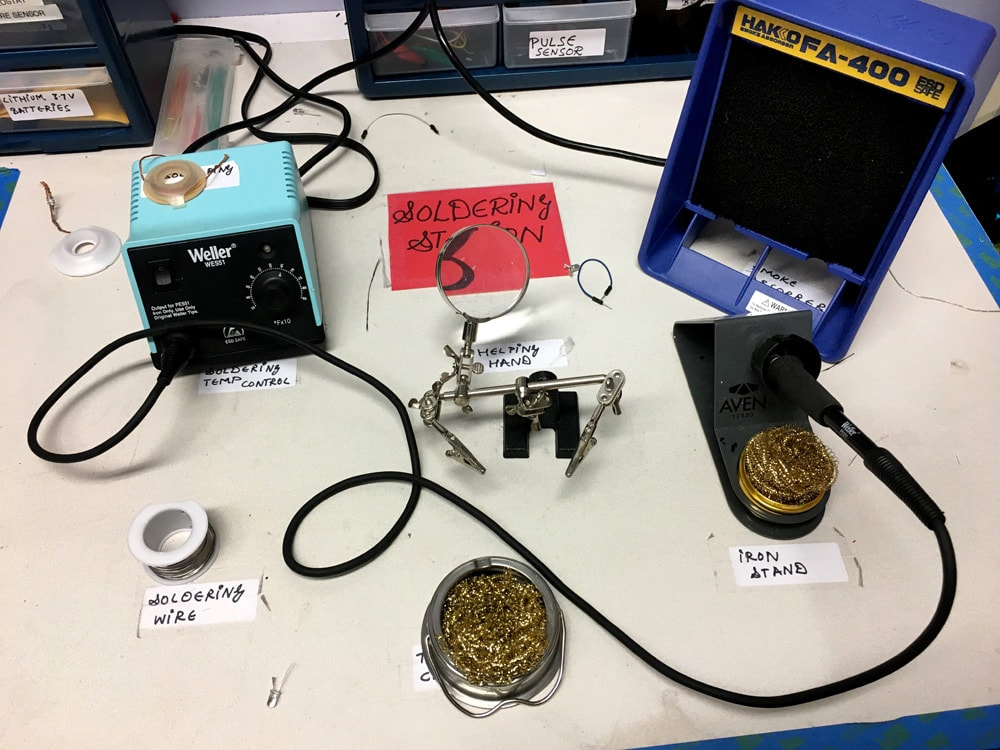
Soldering Station at Acera School, Winchester
What it is: Making electrical connections by connecting wires and other conductors with melted solder
Skills required:
Skills required:
- Prepare wires and other conductors - cut, strip, set up in a fixture "like helping hands"
- Obtain and be able to use soldering tools and accessories: soldering iron, solder, tip cleaner like brass sponge,
- Proper soldering techniques - different methods for wires, pc boards
- Methods for correcting mistakes - solder wick, solder sucker
- Protect electrical connections - heat shrink tubing, strain relief, wire routing
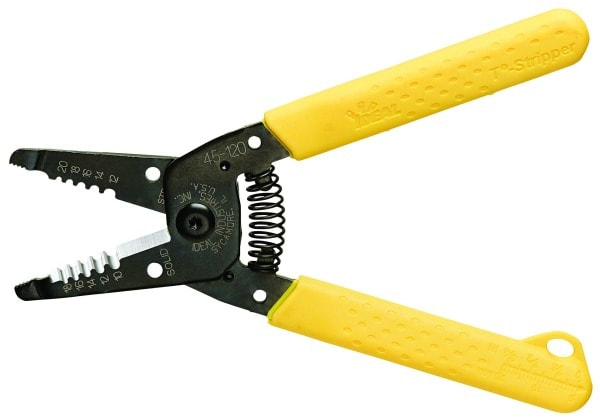
Wire Stripper, Adjustable
|
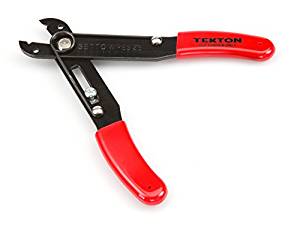
Wire Stripper, Preset
|
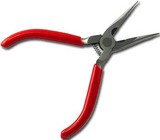
Needlenose Pliers
|
Diagonal Flush-trim cutters
|
Tutorial:
Introduction to tools and materials and practice project:
Materials:
Introduction to tools and materials and practice project:
- Solder is pronounced “sodder”, forget about the “l”
- Show soldering iron, tip, brass sponge, solder, cleaner
- Safety with hand tools:
- Arrange tools so the power cords do not get in the way
- Do not touch hot solder tip to anything but metal
- Heat the part to be soldered, applying pressure- allow solder to flow onto it.
- If you burn skin with soldering iron, put it under cold water asap
- Soldering iron takes 5 minutes to heat up
Materials:
- Soldering Euipment: Iron, Solder, Helping Hands, Tip Cleaner (brass or ordinary sponge)
- Tools: Wire Cutter, Wire Stripper, Needle Nose Plliers
- Watch Basic Soldering Video
Note: if showing video directly to students, DO NOT instruct your students to "flick" solder as shown at 3:20 - solder droplets can easily burn both flicker and flickee! Instead, make sure students use the brass sponge to scrape off excess solder.
- Put on safety goggles
- Cut, strip and solder a wire back together; Use either solid or stranded wire, 20 - 24 gauge wire
- If desired make a chain of wire loops or an Olympic Rings model