MIT Edgerton Center Maker Resources for K-12 Educators MIT Massachusetts Institute of Technology
  Makerspace Resources for K-12 Educators
  • Home
    • Getting Started >
      • What is Making?
      • Types of Makerspaces
      • Goals
    • About Us
    • Contact
  • Teacher PD
    • Webinars
    • Maker Project Workshops
    • Master Making in the Classroom
    • Maker PD Packages
    • Invention Ed
    • Workshop Materials
  • Create Projects
    • Maker Methodology
    • Idea Gallery
    • K-12 Maker Instructables
    • Maker Skills Starter Projects
    • Virtual Tools and Projects
    • Special Programs >
      • Aprendo Creando >
        • Presentaciones
      • FullSTEAM
  • Run a Makerspace
    • Design Guide
    • Facilities and Storage
    • Maker tools
    • Training and Supervision
    • Staff, Hours and Scheduling
    • Events and Growth
  • Maker Tools
    • Shop Tools and Materials
    • Electronics
    • Physical Computing
    • 2D Design Software
    • Vinyl/Craft Cutters
    • Laser Cutting
    • 3D Design Tools
    • 3D Printing
    • Photo and Video
    • Sewing
  • Articles and Books

Getting Started

Creating your own Makerspace
See some of the many types of Makerspaces people are creating for K-12 communities.
Photo of two students working on large tables, one with wood an another with a laptop
Identify your intended audience and define the Goals of your Makerspace. 
Photo of a busy maker space full of people with large tables covered in projects

​Design and Plan

Take the time to design and plan a Makerspace that is appropriate for your space, budget, and community of Makers. 

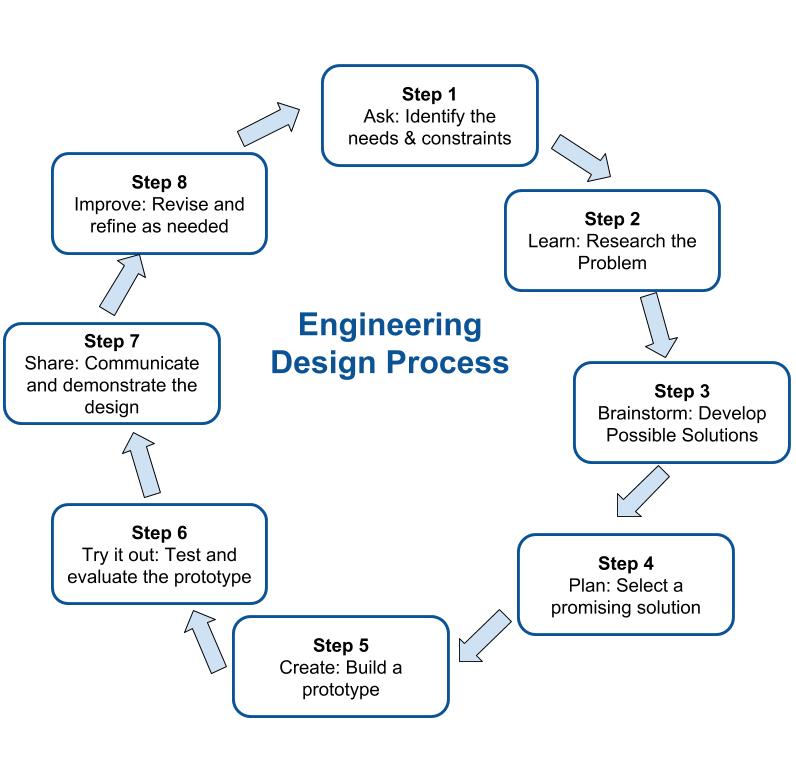
Educators starting a Makerspace can go about it as they would with any other piece of curriculum, program, or space in their organization and use an established design or vetting process to guide them through the process of planning and implementation.  At the MIT Edgerton Center, we live and breathe the Engineering Design Process, and that process guided us when we renovated our historic Student Project Lab (Room 4-409 at MIT) in 2016. Here is how we used the design process to renovate our lab into a Makerspace.

Note: while a shop manager was ultimately responsible for ordering and implementation, notice that every step included collaborative participation with people who will be using (or neighboring) the space.


Infographic overview of the Engineering Design Process that is explained in detail on this page
STEP 1 - IDENTIFY WHAT YOU NEED TO MEET YOUR GOALS
​While it is tempting to run out and buy a 3D printer, Makerspace leaders often advise others to "start small" - define what you want to accomplish by having a Makerspace, and slowly add tools, staff, and programs as you discover that you need them to meet your goals. Our renovated Project Lab needed to do more than run as a Makerspace - we had to fit everything from soldering middle schoolers  to undergraduate physics classes, so our staff needed to draw up a mission statement together. The statement helped us outline our intention to welcome a broader audience: to engage "a variety of communities to...build, learn, and have fun doing it." From this, it became clear that we needed more people responsible for running the space, especially students. To bring in more student help, we became part of Project Manus' on-campus Makerlodge network. Student Makerlodge members train to become shop mentors and volunteer to run spaces in exchange for extra access to space and materials.
​Another note about goals: start thinking about how you'll measure your progress. What you measure will vary depending on your goals - since widening our audience and increasing student ownership were such a big part of our mission, we decided we'd pay attention to the number of new and return users. Consider setting up systems to track and document usage - as a new member of the MIT Makerlodge community, we were able to use their networked sign-in terminal for Makerlodge members to log their visits to the space. Other measurements might include hours of use, products created, press, etc. Measuring students' feelings of engagement and empowerment is more subjective, but in some respects more important.
STEP 2 - DISCOVER HOW YOU CAN MEET YOUR NEEDS 
Research what you already have, what else you need, and what other Makerspaces have done to reach their goals. 

We met with some of our "power-users" -  MIT undergrads, alums, and instructors who had long-term experience working and mentoring in the old space. As long-time users with additional experience at other shops on campus, they had the best ideas about which parts of the shop to keep and which to upgrade in order to meet student needs. 
Three students at work in our newly renovated lab
Three of our power users at work in the lab, post-renovation. John ('19), Chee ('14), and Z ('19) were an important part of the redesign process.
 After a lot of discussion (and pizza) we decided we would keep our open-door policy for visitors, our Wall of Shame for failed projects, and our sturdy homemade worktables - including Doc Edgerton's original workbench. The group decided to decorate with LEDs, add storage lockers for student mentors, remove some clunky photo displays, and stop stocking aluminum bars after we learned that most students weren't using them. Even our most ardent hoarder agreed it was better to have space than a pile of unloved metal gathering dust.

Look to successful spaces to see a variety of setup options. A little bit of Googling will uncover nearby Makerspaces with similar communities that can offer you help and inspiration. If you can't get out in person, explore this site and others to see example spaces. See the Facilities and Storage page for layout ideas and Tools and Materials page for technologies.
 STEP 3 - BRAINSTORM POSSIBILITIES FOR YOUR SPACE
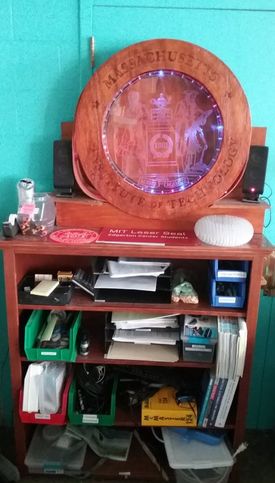
 Collaborate with your team to generate ideas for layouts, uses, and wishlists - the more the merrier! Sandi Lipnoski, our Office Manager, works across the hallway from the Makerspace, and she's the first face most people see when they come to the Edgerton Center; naturally, she was key in bringing a human touch to the new space. She helped to guide the room redesign by advocating for welcoming touches like bright, inviting splashes of color, and handmade wooden furniture stained to match one of our prized student projects.

Photo of a large MIT seal etched on transparent plastic with lights on inside
STEP 4 - CHOOSE A PLAN FOR ACTION
Draw from your collaborative brainstorm to outline a space layout, list of tools and materials, and plans for staffing and programming. We drew up a lengthy to-do list and divided up the work. If your team is having a difficult time agreeing on plans, you may want to use a tool like a decision matrix. Safety and Supervision guides can be found on the Training and Supervision page. ​

STEP 5 - ACT ON YOUR PLAN! 
Follow your plan for changing or building the space - order supplies, set up tools, train staff, etc. See the Training and Supervision page for tool Training guides, Competency Checklists, and Refresher guides for common Makerspace tools. ​
STEP 6 - LET THE MAKING BEGIN
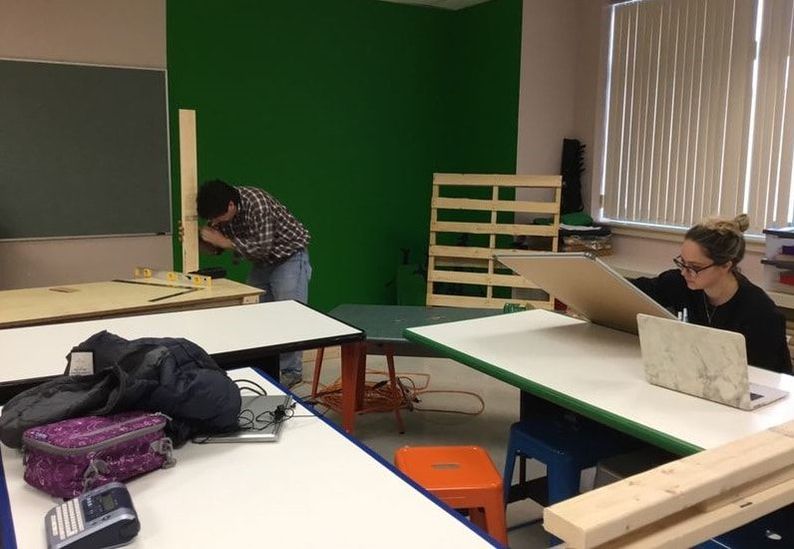
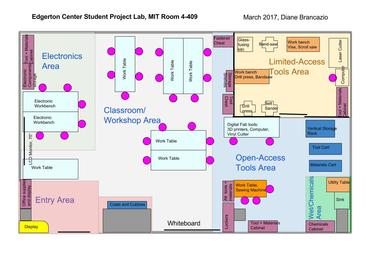
Start running your space - observe students at work, and gather feedback from them, their teachers, their parents, and other staff. Some things will come up that you couldn't possibly have anticipated without active users at work. Compare what's happening to your goals from Step 1, discover new benefits and concerns, and revise goals and plans. This is going to be an ongoing reflective process.

​We completely rearranged our tables 4 times in 2 months before we found our ideal floorplan (at right). Between May and July 2018, the Limited-Access Tools Area has been purged and shuffled at least twice.
Diagram of the floor-plan of our lab
STEP 7 - SHOW AND TELL (OR JUST SHOW OFF)
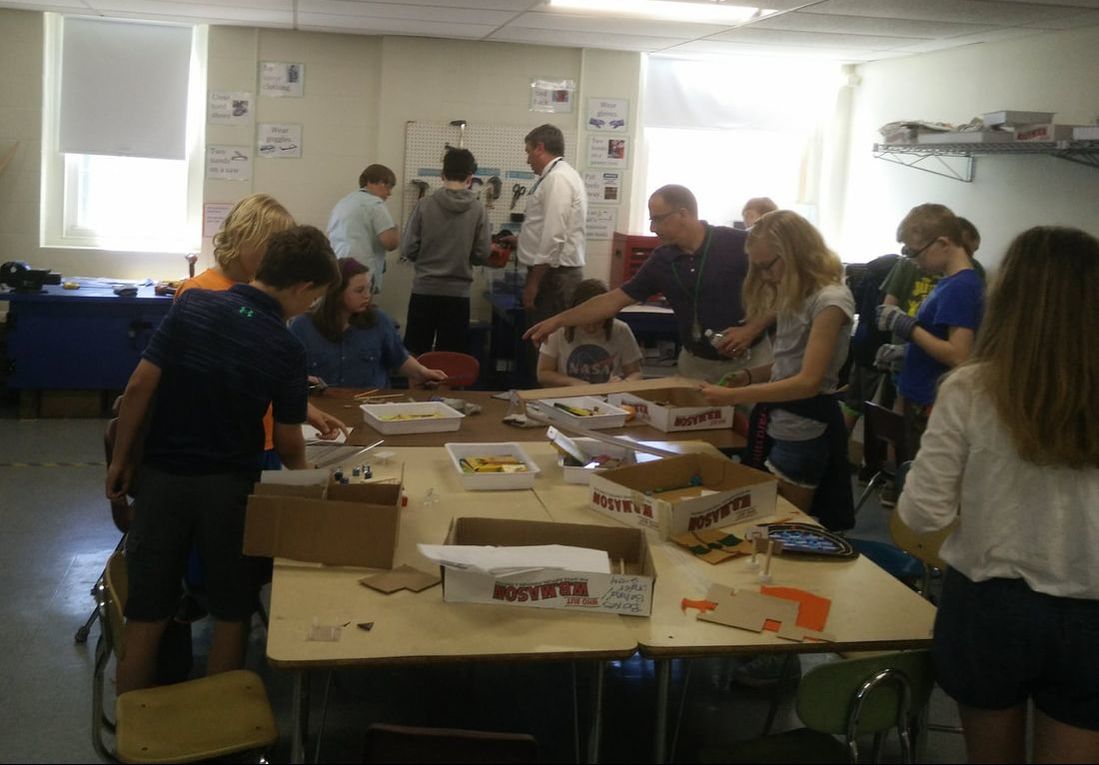
Help your users share the space, their products, or their expertise with the community.  One thing we like to do as part of the MIT Makerlodge network is throw regular Maker parties throughout the school year to invite new students into the space. In 2018 alone, we opened up the Project Lab to host a wind-up toy hacking night and a glass-fusing party. 

Invite the community into the space and gather support - you could do anything from a party to a press conference. Some fun things to share include progress, your students' work, and stats that show how close you are to meeting your goals. 
Step 8 - REVISE YOUR PLANS AS NEEDED
Keeping your space functional for users will be an ongoing process, and will require revision to the space, staffing, and goals - expect to head back into the cycle at Step 1 as needed. As we expanded our programming to serve more K-12 professional development, we began to regularly stock more craft supplies like flexible foam sheets, pipe cleaners, and googly eyes.
Picture
Check out video of the toys our visitors made at an Open Makerlodge night

Contact Us

Step-by-Step guide to running a Makerspace
Materials for Workshop Participants
​​Recursos en Español
About Us
Accessibility
​Privacy
Maker Resources for K-12 Educators © 2023 by MIT Edgerton Center is licensed under CC BY-NC-SA 4.0 
  • Home
    • Getting Started >
      • What is Making?
      • Types of Makerspaces
      • Goals
    • About Us
    • Contact
  • Teacher PD
    • Webinars
    • Maker Project Workshops
    • Master Making in the Classroom
    • Maker PD Packages
    • Invention Ed
    • Workshop Materials
  • Create Projects
    • Maker Methodology
    • Idea Gallery
    • K-12 Maker Instructables
    • Maker Skills Starter Projects
    • Virtual Tools and Projects
    • Special Programs >
      • Aprendo Creando >
        • Presentaciones
      • FullSTEAM
  • Run a Makerspace
    • Design Guide
    • Facilities and Storage
    • Maker tools
    • Training and Supervision
    • Staff, Hours and Scheduling
    • Events and Growth
  • Maker Tools
    • Shop Tools and Materials
    • Electronics
    • Physical Computing
    • 2D Design Software
    • Vinyl/Craft Cutters
    • Laser Cutting
    • 3D Design Tools
    • 3D Printing
    • Photo and Video
    • Sewing
  • Articles and Books