About our Maker Methodology
In a Maker classroom, we empower our students to learn and create by helping them follow an open-ended design process. A design process can also be a powerful tool for teachers creating Maker projects - it's a reliable way to create and recreate projects that
- meet your learning goals
- fit your constraints
- ignite student enthusiasm
- help you grow professionally
That's why we worked with other teachers to create and test our Maker Methodology - a teacher-friendly design process for creating, planning, and facilitating meaningful Maker projects. Our printable tools are available online for free at the website pages linked below.
Check out our 10-week Master Making in the Classroom PD for K-12 Educators

Steps of the Maker Methodology
Click each step for information and downloadable planning tools
- Define your learning goals for the project
- Discover other projects that can inspire your own
- Design and Choose your own Maker project ideas
- Plan the day-to-day details of your project
- Deliver your plan - roll out the project and facilitate your students' work
- Share your students' work with a larger community
- Reflect and refine improve your project plans

Outline of the Maker Methodology
Teachers Define
Pick learning objectives and possible tools 0 - Definition Template
Teachers Discover
Research existing projects and draw inspiration from them
Teachers Plan
Plan project details: activities, schedule, etc.
1. Project Overview Template
2. Lesson + Activity Planning Template
3. Maker Project Checklist
Teachers Deliver
Students Define
Learn the project requirements
Students Learn & Explore
Research the topic and possible ways to carry out the project, look at samples, learn how to use the tools, try things out.
Students Design & Choose
Come up with several ideas and choose one
Students Create
Plan the work, get materials, build the idea
Students Observe and Improve
Check your product with the requirements, identify things to improve, review with classmates, etc.
Loop back to Create!
Students reflect
Think and write about what you did and learned, etc
Students reflect
Share Show project results in and out of the classroom
Teachers Share (along with the students)
Teachers Reflect
Teachers think and write about what they did and learned, and modifications for a future project, etc.
Step 1: Define

The beginning of a design process can be a little daunting. Take the first step by defining your goals and constraints for the project. What are your content learning goals for the project? What kind of project work do you want to students to produce? What are your limitations?
Use an outline to list your ultimate goals, resources, and constraints. Use this printable outline to get started.
Step 2: Discover
Once you've defined your goals and constraints, do a little research to discover what already works well in a Maker project.
The Idea Gallery is a collection of adaptable, inspirational Maker project ideas that have been shared by K-12 Teachers and Maker-Educators. Most of these projects have been classroom-tested and include information on how the project was used with students. We add to this collection regularly. If you've got ideas to add, send them to us!
These adaptable project ideas are organized by Objects OR Tools, NOT by core subject area or grade level. Objects are the kinds of things that students will create and Tools are the specialized Maker tools and materials that students will use.
Graphics
Brochures
Signs
Stickers
Portraits
Websites
Books and Comics
Data visualizations
2D/3D characters
Audio
and Video
Animated graphics
Sound effects
Stop-motion animationPlays
Skits
Songs
Documentary
Collections and Collages
Group murals
Patchwork quilt
Currency
Time capsule
Chess set
Collectible figurines
Trading cards
Clothing and Wearables
Hats
Shoes
Jewelry
Costumes
Protective gear
Body monitors
Prosthetics
Mechanical Devices
Machines
Robots
Wind-up toys
Kinetic sculptures
Cars
Aircraft, Trains, Boats
Rube Goldberg machines
Toys
and Games
Puppets
Board games
Skill games
Videogame controllers
Dolls
Puzzles
Quizzes
Arcade games
Sports games
Card games
Coding
and Apps
Video games
Apps
Automation scripts
Digital animation
Motion detection
Environmental monitoring
Device controls (robotics controls, alarm systems...)
Molds, Stamps and Stencils
Cookie cutter
Silkscreens
Ink stamp
Logo stencils
Alphabet stencils
Wax stamp
3D mold
Technical
Models
Realistic dioramas
Scale models, miniatures
3D anatomical diagrams
Buildings, bridges, and other structures
Furniture
Biomimetic devices
Tools, gadgets, and inventions
Expressive Models
Portraits
Trophies
Monuments
Abstract art objects
Cell analogies
Props for characters
Theatrical scenes and settings
Statues
Decorative pieces
As we learned in 2020, remote teaching can be a reality. The good news is there are plenty of online tools that are creative, collaborative, expressive, free, and browser-based - and therefore available to anyone with a device and reasonably reliable WiFi. We've put together a collection of tools and tutorials for Virtual Maker Projects. Use them to create your own Maker projects and keep your students Making and building community, wherever they are.
Get inspired!
Idea Gallery of sortable project summaries
Virtual Maker Projects videos, animations, 3D models, graphics, interactive slides, etc.
Create Projects page with example Maker Projects from our Master Making in the Classroom program
Step 3: Design and Choose
Space is at a premium in many schools, and the Makerspace is no exception. However, if you can, it's helpful to designate spaces in or around the Makerspaces to proudly display finished projects. Show off a few smashing successes (and educational failures) on display to inform and inspire future creations.
Design
Maker Mock-Up: A Tool for Creative Ideation
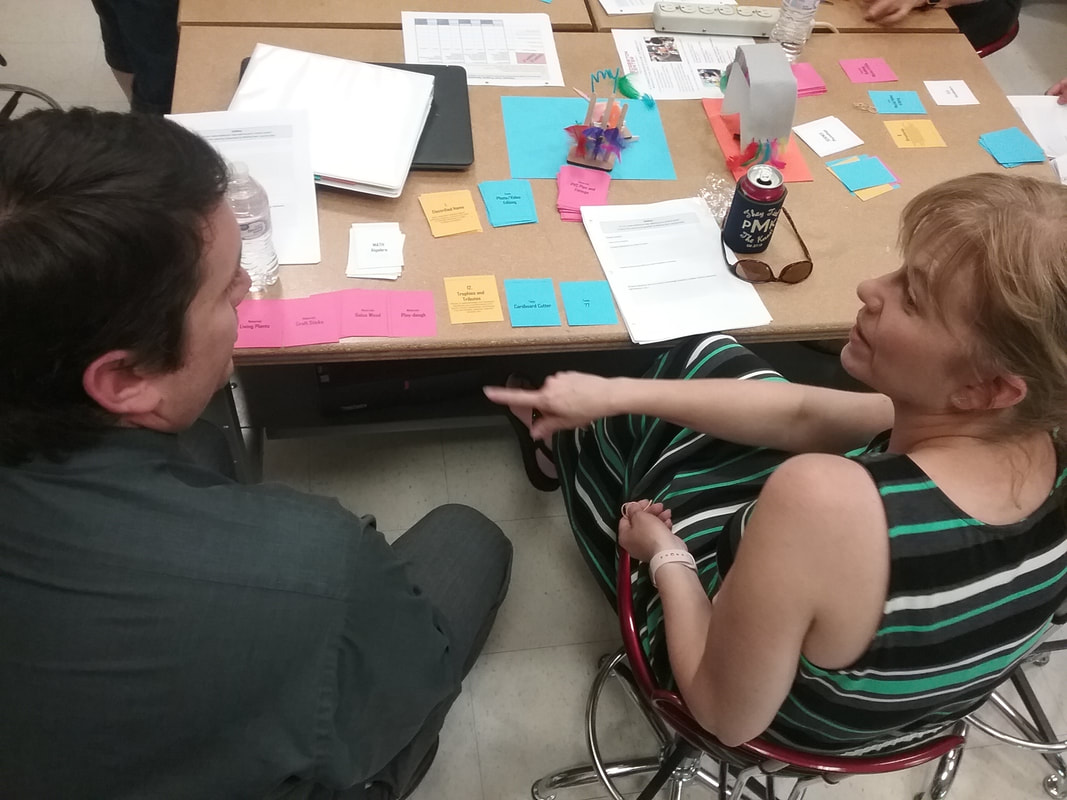
"...The card game was a real game changer in terms of pushing lessons into new places, and allowed for some really great collaborative ideas."
-Nicole Winters, Art Teacher, Littleton Middle School
Download and use this game with colleagues to start creative conversations about how and what your students can make. A deck of Maker Mock-Up cards includes Tool, Material, Object, and Focus cards.
Here's how to use it:
Prep the deck - remove any cards with tools/materials you don’t have; shuffle each category separately.
Choose one subject card OR your content standard.
Deal one hand for the group:
Combine cards to come up with 3+ ideas for projects
Or...make up your own rules! Leave out a Focus card, time your rounds, pitch competing ideas - make this game what you need it to be.
Play Maker Mockup Online
Instructions
- Gather a group of 2 to 4 people.
- Choose a learning objective with the group - ideally something you really teach in your classrooms!
- Deal a hand to the group:
- 1 Object card
- 2 Tools cards
- 3 Materials cards
- Deal new materials or tools if you don't have the ones shown
- As a group, come up with at least 3 project ideas from the cards handed out.
For a good brainstorming session
- Write down all the ideas: there are no bad ideas!
- If you don't understand an idea, ask questions.
- Listen to others and encourage their ideas
- Build on or combine other ideas
- Have fun!
Design
Maker Mock-Up: A Tool for Creative Ideation
"...The card game was a real game changer in terms of pushing lessons into new places, and allowed for some really great collaborative ideas."
-Nicole Winters, Art Teacher, Littleton Middle School
Download and use this game with colleagues to start creative conversations about how and what your students can make. A deck of Maker Mock-Up cards includes Tool, Material, Object, and Focus cards.
Here's how to use it:
Prep the deck - remove any cards with tools/materials you don’t have; shuffle each category separately.
Choose one subject card OR your content standard.
Deal one hand for the group:
Combine cards to come up with 3+ ideas for projects
Or...make up your own rules! Leave out a Focus card, time your rounds, pitch competing ideas - make this game what you need it to be.
Play Maker Mockup Online
Instructions
- Gather a group of 2 to 4 people.
- Choose a learning objective with the group - ideally something you really teach in your classrooms!
- Deal a hand to the group:
- 1 Object card
- 2 Tools cards
- 3 Materials cards
- Deal new materials or tools if you don't have the ones shown
- As a group, come up with at least 3 project ideas from the cards handed out.
For a good brainstorming session
- Write down all the ideas: there are no bad ideas!
- If you don't understand an idea, ask questions.
- Listen to others and encourage their ideas
- Build on or combine other ideas
- Have fun!
Choose
After creating some project ideas, it can be tough to choose the best one for your needs. We offer 2 tools that can help you.
(Hint - students can also use these tools when it's their turn to choose their own project idea.)
The Pro/Con list lets you consider important strengths and weaknesses quickly, but the criteria/constraints are not clearly defined
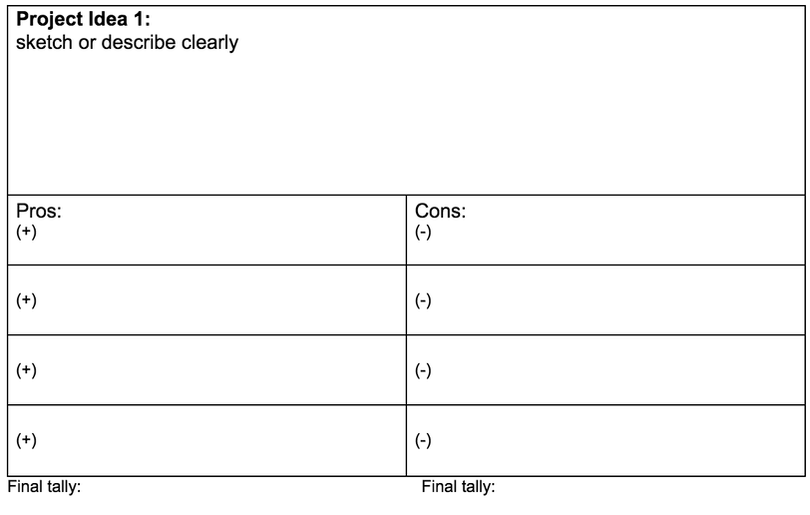
The Decision Matrix helps you discuss each project in depth - it lets you define and weight your criteria and constraints, and helps you rank ideas. Be prepared for your team discussion to take some time.


Step 4: Plan
Lay the groundwork for a successful project

So much planning goes into open-ended student projects and observers often don't know - but we do! That's why we drew up some templates to help you plan for Maker projects that can require a lot of resources. You'll recognize a lot of familiar elements from templates that you already use, but we made sure to incorporate Maker-specific concerns for extra guidance (required tools, time, design process for students, etc.)
Download templates here:
- Project Summary and Detailed Plan
Outline the project, plan activities and resources for each step of the project, make a schedule - Project checklist
a quick self-assessment - does your project have what it needs to give your students all the benefits of a Maker experience? - Teacher Practices and Strategies - template
- Check that your teaching style and activities promote a Maker mindset. If not, adapt them.
Step 5: DELIVER
Practices and Strategies for teachers leading Maker projects

Kathy Malone coaches 1st graders as they use a stop-motion animation app to shoot their first short film.
In a Maker project, your role will shift from instructor to facilitator. Teaching through Making can present new challenges, even for an experienced teacher:
- difficulty tracking students’ progress
- more classroom materials and technologies to manage
- students' widely varying comfort levels using new technologies
This shift can also be hard on students who are used to direct instruction:
- Students are stuck and do not know how to proceed
- Students are coming back to teachers for help instead of using available resources
- Students groups are having trouble working together
- Students are reluctant to engage
Essential Maker facilitation practices
For a Maker project to be a rewarding experience for all, both the teacher and students will likely need to develop new practices. We recognize 7 essential practices and strategies for effective project facilitation, and compiled a variety of facilitation moves to support these practices.
Teacher Practices and Strategies
What it Looks Like / Moves
1. Include joy, fun, and non-traditional experiences!
Create an atmosphere that is lighthearted and welcoming
- Smiles and greetings
- Demonstrations
- Relevant/fun video clips
2. Hear all voices, early and often, loud and soft, through posts, images, and other shares, as well as synchronous speaking
- Hear from everyone on 1st days
- “Pass it on” from kid to kid
- “Calling sticks” made in advance
3. Notice, connect, and encourage
Check in on students that drift off or miss activities, welcome them back, and support them in getting back on task
- Make contact with each individual
- Listen for personal interests
- Keep attendance
- Do frequent check-ins
4. Expect many ideas, many tries, evidence-based decisions
Brainstorm, iterate (repeat the project, learning from problems and mistakes) at least once, and proceed with defendable choices.
- Brainstorm: Save first idea then look for more
- Iterate: Try, Test, Reflect, Improve, Try again. Do quick cycles!
5. Have systems and materials ready and make sure students how to use them Organize tools and resources so that they are easy for students to find, understand, and use
Practice all work-flows with students
Have lots of sample work available
- Provide links to online resources
- Clearly mark bins and workspaces
- Train students on all on common tools
- Create systems for sharing tool and materials
- Do a simple sample project that requires the use of all tools, materials, and systems
6. Foster collaboration and citizenship Encourage teamwork, but don't expect it will always be good. Include group work and peer review in projects.
- Acknowledge that teamwork is not easy and takes a while to develop skills
- Break up project into many tasks and let students each choose several
- Use online sharing tools
7. Foster Self-Confidence and Self-direction
Expect and encourage students to find resources, make choices, and answer questions on their own.
- Ask open-ended questions, and make it clear that there is no “wrong” answer
- Choose your battles - when to answer, when to help, when to let them figure it out
Step 6: Share
Ways to share student work outside the classroom
When students know they'll be sharing their projects with an audience beyond the classroom, their classroom experience takes on more real-world context, and they feel more invested in doing quality work. Depending on the nature of their project, public sharing can even be an integral part of the project.
Here are a few different ways to share student work, during and after their projects are complete. Some are simple ways to get started, others require more planning and organization.

Blogs and Social Media
Take pictures of student work in progress, and share via Twitter or Instagram. Or consider using a student-sharing platform like Flipgrid or Seesaw to embed students' photos into a blog within a pre-existing school or class website. Littleton Middle School has a great example of an embedded Seesaw feed that allows students to directly upload pictures of their work.
Shared school spaces
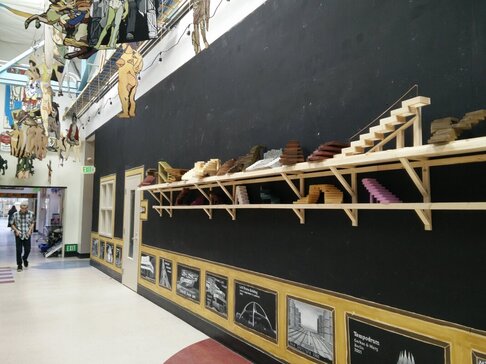
Display work in the hallways, libraries, and any other place outside the classroom where students regularly spend time so that they have a chance to informally share with peers. Here, a school takes advantage of the high ceilings in their hallways to hang student work.

Special guests
If students are designing a product, invite local entrepreneurs or investors to come offer feedback on students' prototypes. If they are creating something with code, invite local programmers. If they're working with textiles, invite a knitter - maybe even a student's relative - to teach them a new skill they can incorporate into their projects. For a musical instrument engineering course, La Fundación Mustakis in Santiago, Chile invited professional musicians from a local music non-profit to direct their students, as they performed on the instruments they created.

Exhibitions - classroom
Several times a year, a 3rd grade classroom at a Cambridge Elementary school hosts an open house. For the first hour of the day, the room is converted into a gallery of student projects, and families are invited to stay after drop-off to browse student creations, chat, and pour a cup of coffee. The event itself creates more opportunities for students to participate and take ownership - they prepare the space, making signs and rearranging desks into different viewing areas for each project.
Exhibitions - school-wide
Starting in 2018, the Bagnall Elementary School in Groveland, MA holds an annual Design and Engineering Expo. A family-friendly open house, students run exhibition and activity tables based on their academic Maker projects and their passion projects from open hours in the Makerspace. Other community members - like older students from middle and high school, local science museums, and artisans - are also invited to run their own activities.
Press
Prepare a press release about the work you're doing, and invite local media to talk with you and the students about their work. Depending on project focus and student skill level, you could even put students in charge of preparing the media release.
Built-in Sharing with Community Partners
As you get more comfortable designing and leading Maker projects, you might start planning projects centered around making things designed for viewers or users outside the classroom - collaborative murals in public spaces, inventions to help seniors, etc. At the Bagnall, the 4th grade students work as stewards of a local hiking trail, learning how to identify plants, maintain a trail, create informational signs and brochures, and give tours.
Step 7: Reflect

The Maker Methodology includes a step where you Reflect on the project you just completed - the process of creating it and leading it. It is a time to identify and evaluate your strategies and practices, how they worked for you and for your students, and and develop insights that will help you on future projects.Reflection is thinking about what you did, comparing it to what you meant to do, and assessing whether what you did met expectations. In school it is a way for teachers and students to become more self-aware, understand how they behave, think, learn, and teach, and a way to identify their strengths and weaknesses.Reflection doesn't need to take much time, and done well it can yield many benefits to teachers and students. One benefit is that the "reflector" can put names to their behaviors and skills, enabling transfer or modification of that skill. For example, a student who did all the explanation parts of a Science project well could say he is skilled at technical writing and a good communicator, skills that are now available to him in classes other than Science.

A teacher using a new technology asks the students to learn it on their own and share the knowledge, amongst themselves, making sure they can meet the requirements of her project. With terminology from a reflection, she can now see herself as a facilitator, promoting self-direction and collaboration skills in the students, though she may have felt unprepared when starting the project. Once a student (or any person) starts to play an active part in their learning cycle, they become more aware of different styles and skills, more self-aware, and more able to develop the skills they want. This is essential for students to develop key skills and to become lifelong learners.
Here are some questions to consider when creating reflection activities for students: Reflection Qs - students
You can use our Reflection Guide for Teachers to help you review your experience - one side is a simple rubric, the other side asks more open-ended questions.



.svg)